FRANK LLOYD WRIGHT ARCHITECTURE DESIGNS

2 Apr

FLW 1

Hello again! Life has gotten busy with a full school schedule and my now one year-old son. I am excited to share some of the great creations my students have been working on. Thanks for reading!

FLW 2

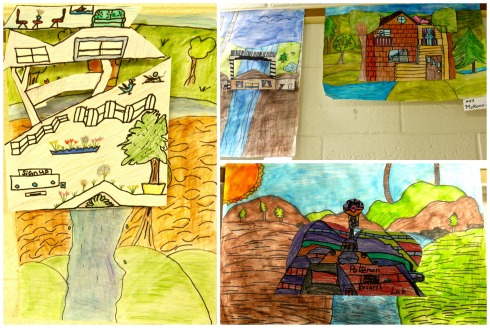
The Central Idea for my 4th grader’s Where We Are in Place and Time IB unit is “Civilizations are dependent upon the geography of a region”. The unit explores how individuals contribute to the culture and growth of a region and explores the physical features of that region. We focused on the architect Frank Lloyd Wright as our inspiration.

FLW 8

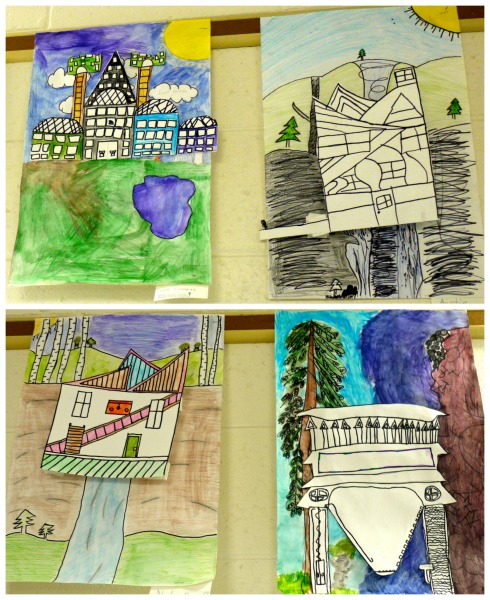
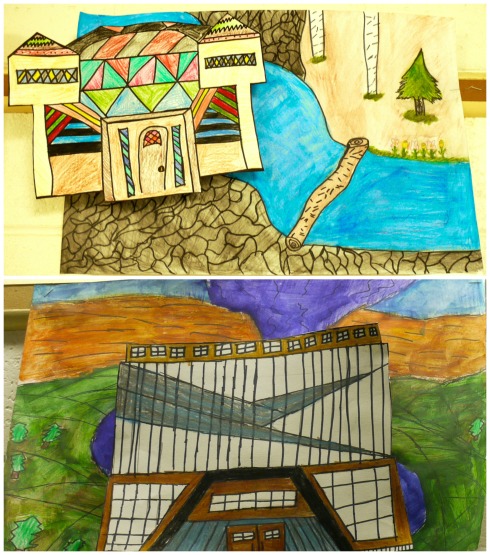
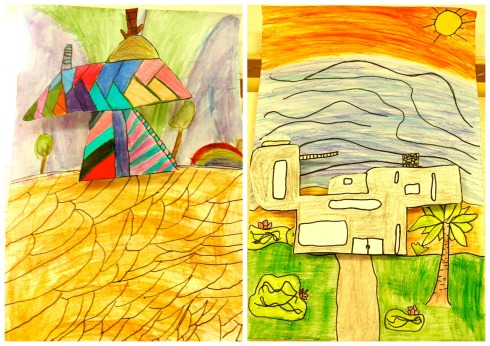
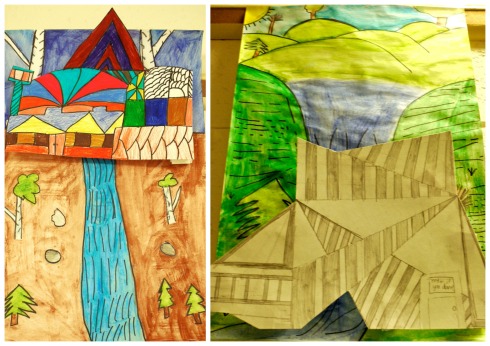
Students first studied the varied landscapes of Wisconsin, from the densely forested Northwoods to the sandstone bluffs found near the Dells, to the sand dunes and waterfalls found in our State Parks. We talked about how Frank Lloyd Wright designed his buildings to fit within a landscape, allowing nature to play a star role in his designs.

FLW 7

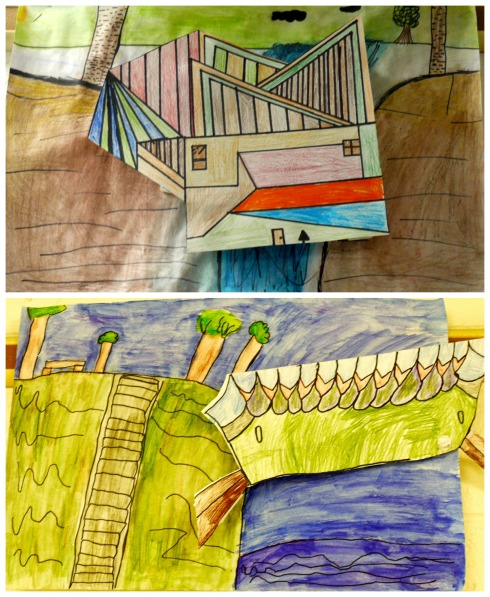
Students then illustrated their backgrounds as inspired by their knowledge of Wisconsin landscapes. They made sure to add many details to make their scenes interesting as well as to use previous techniques learned to create the illusion of space.

FLW 6

After their backgrounds were complete, we studied some of the local buildings designed by Wright. We are lucky to have Wingspread and the S.C. Johnson building in our very own backyard! We also looked at other Wright architecture found in our state, from the Monona Terrace to his Taliesin studio in Spring Green. We discussed how his style of architecture uses many geometric shapes and angles. They loved his unique style and were eager to design their own inspired houses or buildings that fit into their landscapes.

FLW 5

FLW 4

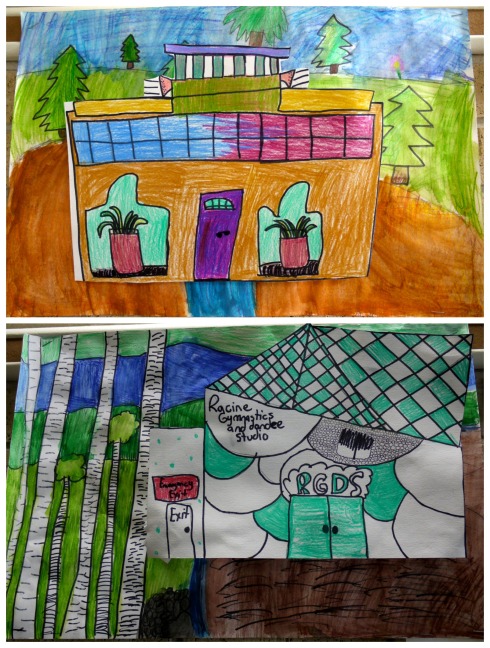
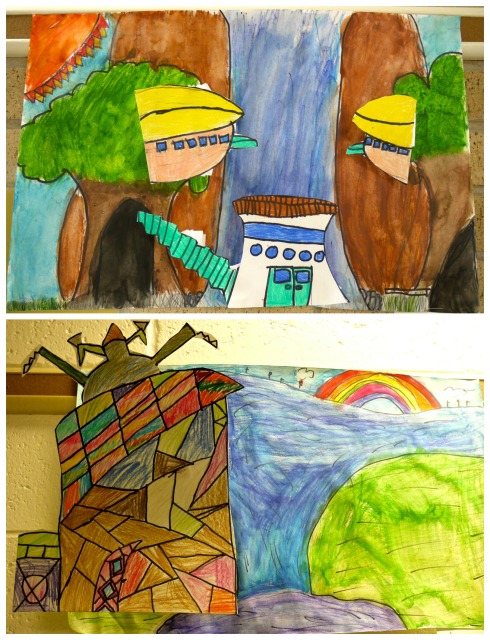
After their buildings were complete, we made pop-ups to attach to the back of them so that they would pop out from the backgrounds. The added dimension really made their buildings stand out. I can’t wait to see what my 4th graders this year come up with!

FLW 3

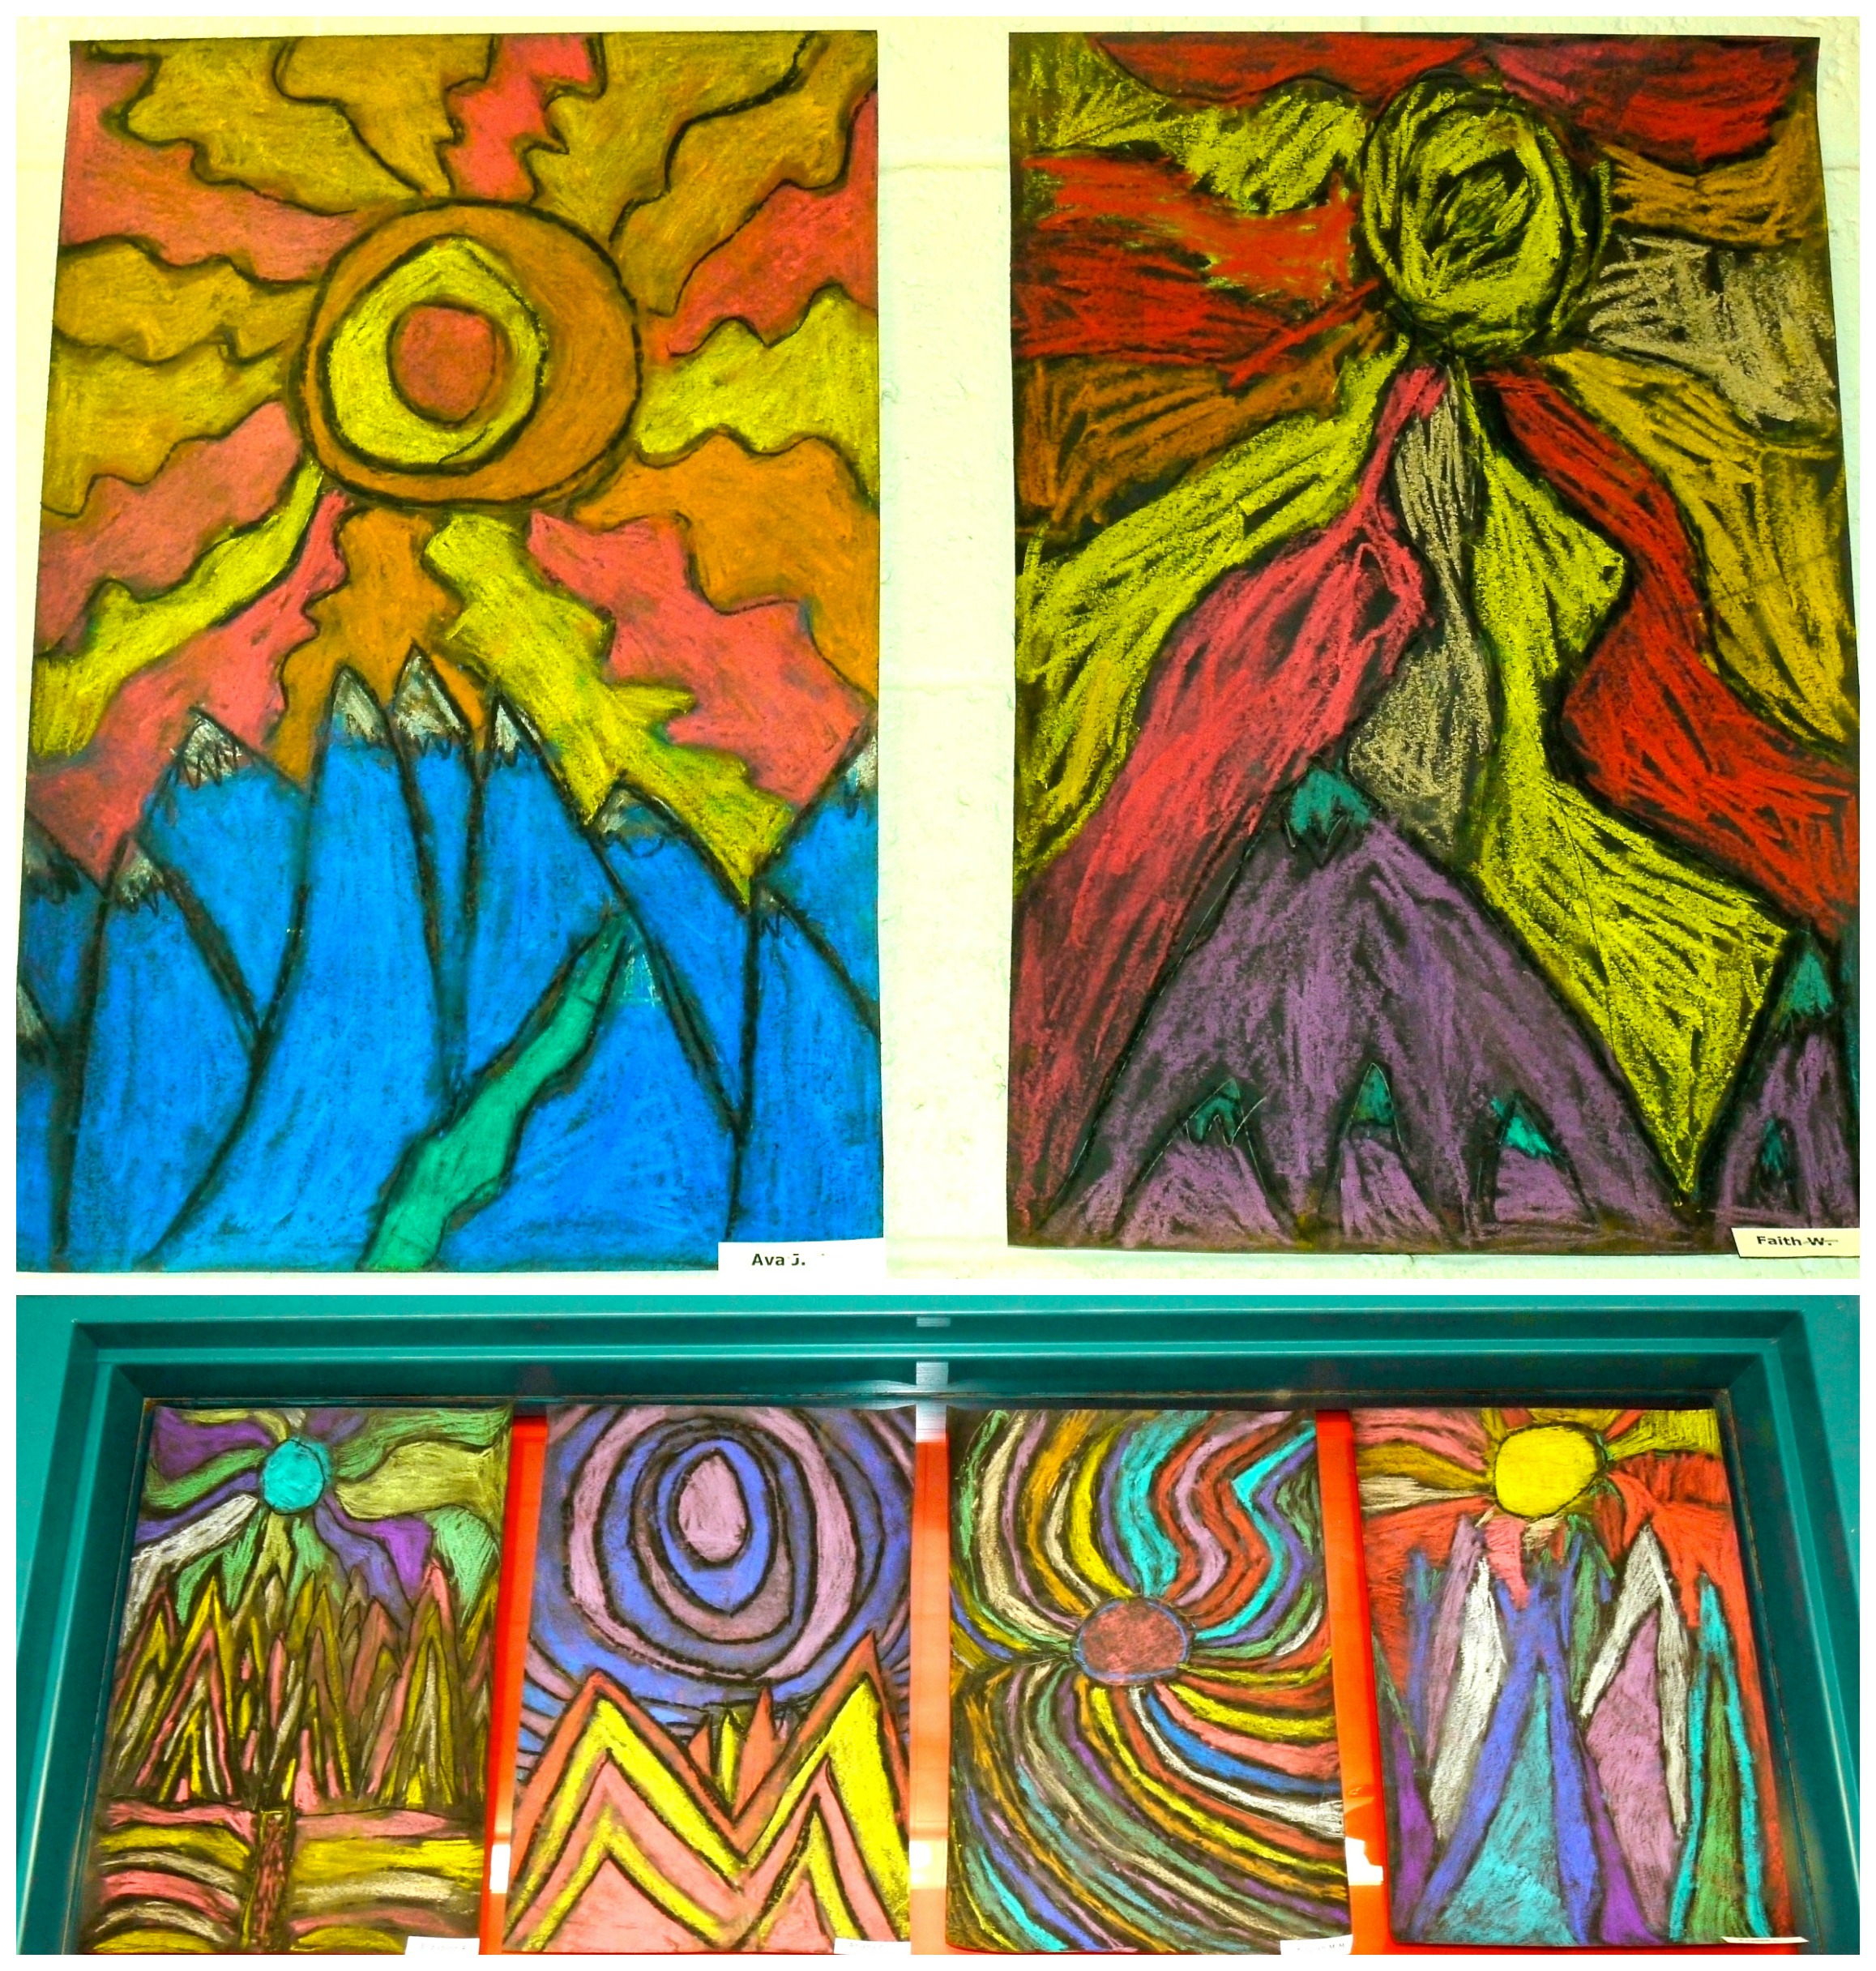
We found quite a bit of interesting info in the book Frank Lloyd Wright for Kids: His Life and Ideas. This computer animated video of Fallingwater and its construction also fascinated the kids.

FLW 9

SaveSave

3RD GRADE GLUE RESIST PASTEL LEAVES

11 Oct

glue resist pastel leaves. colors of my day blog.

Fall is such an inspiring time of year and I love to incorporate the changing leaves into art lessons whenever possible. I am currently working on this lesson with my third graders this year; these examples were created by the students at the bilingual school I previously taught at.

We start out the lesson by viewing examples of real leaves that students bring in. I also like to show them Autumn Leaves by Ken Robbins and Leaf Man by Lois Ehlert for additional examples and inspiration. We study the contours of the leaves, noting how some have wavy, zig zag, or curvy lines. Some are symmetrical while others aren’t. We talk about their shapes and the patterns the veins make.

glue resist pastel leaves. colors of my day blog.

After sketching out ideas, students draw one large leaf on black paper then outline with white glue. The next class, we view some close-up leaf paintings by Georgia O’Keeffe and study the real leaves again, noticing how the colors blend softly together. Students use warm colors for the leaf and cool colors for the outside to create a bold contrast.

glue resist pastel leaves. colors of my day blog.

glue resist pastel leaves. colors of my day blog.

Each student’s leaf turned out so bright and colorful and the student’s loved how the lesson connected to the current season. They were so excited to share both their found leaves and their beautiful artistic representations!

glue resist pastel leaves. colors of my day blog.

3RD GRADE PATTERN PUMPKINS

30 Sep

P1060227

We have been busy settling into the new school year and have just begun focusing on our fall-themed projects. The next month I will be posting some spectacular and colorful art projects created in the past autumn seasons. The leaves here in Wisconsin have just started to change so what perfect timing!

This was a lesson third grade students worked diligently on last fall. We started the lesson by observing a real pumpkin and making a list of adjectives to describe it. Students noticed that the pumpkin was shaped like a sphere with curved lines that started at the stem. These lines also gave the pumpkin a bumpy texture. We practiced drawing the pumpkin from life, making sure to carefully observe each detail in order to create the most realistic pumpkin. Once confident, students drew another large pumpkin on their final papers. They then drew two diagonal lines to create a background.

pumpkin pattern2

The next class, students again observed the pumpkin and came up with a list of colors they noticed. We practiced mixing new colors out of yellow, orange, white, and brown paint. This was by far the most joyful part of the project as students were amazed at all the new color combinations they were able to create. They blended colors for the pumpkin then also had to mix 4 different tints for the background.

pumpkins pattern1

Lastly, students used their knowledge of line to create bold patterns for their backgrounds using black paint. The simple outlines and patterns also helped to emphasize their lovely pumpkins as well as all the great new color combinations created.

P1060220

Inspired by this lovely pumpkin project.

2ND GRADE TED HARRISON INSPIRED LANDFORMS

3 Apr

chalk land2

When I found out my 2nd graders were studying landforms in their Social Studies unit, I knew I had to try these Ted Harrison landscapes again. We went about the project in a pretty similar fashion but this time, instead of using glue to trace the lines, the students traced over their lines at the beginning and end with black oil pastel to help their designs stand out. My students were so eager to share and apply their knowledge of landforms and their enthusiasm really shone through on the final artworks.

Chalk pastels are definitely one of the messier mediums but there’s something about their vibrancy and boldness that make each project stand out. I’ve found it helpful to give students a baby wipe after each chalk session–cuts down on clean up time at the sink and encourages the more mess-adverse students to continue knowing that they can spiff themselves up at the end.

chalk land3 chalk land4 chalk1

2ND GRADE 3D TOPOGRAPHIC MAPS

2 Apr

topo maps 4

2nd grade students created these colorful 3D topographic maps to correlate with their classroom unit on landforms. We studied some of the ways in which these types of maps are used by scientists and environmentalists and viewed real-life examples. We also were impressed by these awesome works of art created by paper artist Jen Stark. Students got to work creating their first large shape and had to follow a formula to continue making smaller, concentric shapes. We used small recycled cardboard pieces between each layer to make our maps pop. The technique was tricky at first but the second graders rose to the challenge and were able to create these masterpieces!

topo maps1 topo maps2

topo maps3

4TH GRADE CAMOUFLAGE ANIMALS

25 Mar

Image

Classes have been busy this spring exploring our IB units in depth. 4th graders were learning about animals’ use of mimicry and camouflage as a means of survival in their homerooms. To begin our unit, we watched this great video about animal camo. We viewed different animal patterns up close and students had to choose an animal with a distinctive design or texture for their projects. After printing off reference photos, students got busy on their practice drawings, trying to make their animals as realistic as possible. Once confident they had their best, students transferred their drawings onto the scratch art paper. We learned different scratching techniques with the stylus tool to help represent the texture of the animal’s fur or skin. For the finishing touch, students recreated their animal’s pattern with oil pastels for a border, again trying to use blending and coloring techniques to represent that texture. Students were very focused and engaged while working the entire quarter on this project! The results are absolutely amazing.

Image

Image

Image

Image

Image

Image

Image

Image

4TH GRADE PAUL KLEE INSPIRED CUBIST HEARTS

24 Jan

Image

4th grade students studied the Cubist paintings created my Swiss artist Paul Klee, focusing in on his Rose Garden masterpiece in particular. We discovered that in the Cubist style of painting, the artist uses lines to break up the picture plane into many different angles. Students took this inspiration to make a design using heart stencils they created and then drew over using horizontal, vertical, and diagonal lines. Each newly created space was then colored in with crayon and painted over with liquid watercolor in a wax resist style.

Inspired by this lesson from A Faithful Attempt.

Image

Image

2ND GRADE JIM DINE PRINTMAKING HEARTS

18 Jan

Image

Students last year created these Jim Dine inspired heart prints exploring texture and printmaking techniques. We viewed examples of Dine’s well-known heart paintings, studying the many colors and paint techniques he used. We colored a background for our prints using construction paper crayons, though if I taught this lesson again a solid color would help the prints to stand out more. We read A Zeal of Zebras: An Alphabet of Collective Nouns by Woop Studios to get some ideas for the texture to add to our foam hearts. Students then printed their designed hearts onto their backgrounds. For a finishing touch, students used a recycled toilet paper tube bent into a heart shape to print a frame for their heart designs. Printmaking is such a magical process for young students!

Image

Image

Image

PreK KENTE CLOTH COLLABORATION

8 Dec

Image

Closing out our African Art Unit, PreK students helped to make these giant collaborative Kente Cloths over four 30 minute class periods. First, students used their fine motor skills to practice cutting strips of paper in some of the traditional Kente cloth colors. The next class, students took turns gluing the strips to large butcher block sheets of black paper. The third class, they tried out some color mixing on oversized paper. For the grand finale, we watched this great video showing examples of the Kente cloth and artisans weaving them skillfully on large looms. We learned when you weave you have to go over and under like a pattern. Ahead of time I folded and cut the black collaged paper into a huge warp and the painted paper into strips for the weft. Students took turns weaving carefully until each Kente cloth was complete. What a statement they made!

Inspired by this project found on Artsonia.

 Image

Image

Image

3RD GRADE AFRICAN MUDCLOTHS

7 Dec

Image

3rd Grade students enjoyed making their own versions of African Mud Cloths. They viewed a powerpoint with many examples and learned the history and traditional methods of their creation. Of course they were surprised to find that actual mud was used to create the colors! This is an excellent website that gives a history of the mud cloth and lets you create one virtually. The students loved working together to create a virtual version before getting started on their own. They viewed examples of the mud cloth as inspiration when creating theirs, using geometric shapes, repeating patterns + symmetry, and earthy colors.

Inspired by this project found on Artsonia.

Image

Image

Image

Image