Tag Archives: nature

3RD GRADE GLUE RESIST PASTEL LEAVES

11 Oct

glue resist pastel leaves. colors of my day blog.

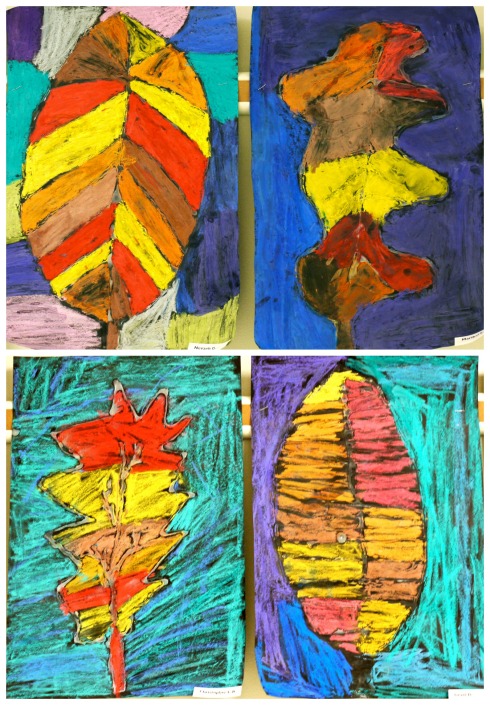
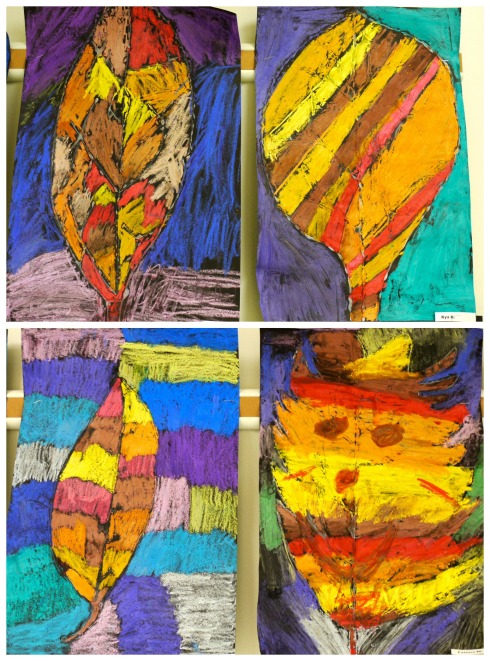
Fall is such an inspiring time of year and I love to incorporate the changing leaves into art lessons whenever possible. I am currently working on this lesson with my third graders this year; these examples were created by the students at the bilingual school I previously taught at.

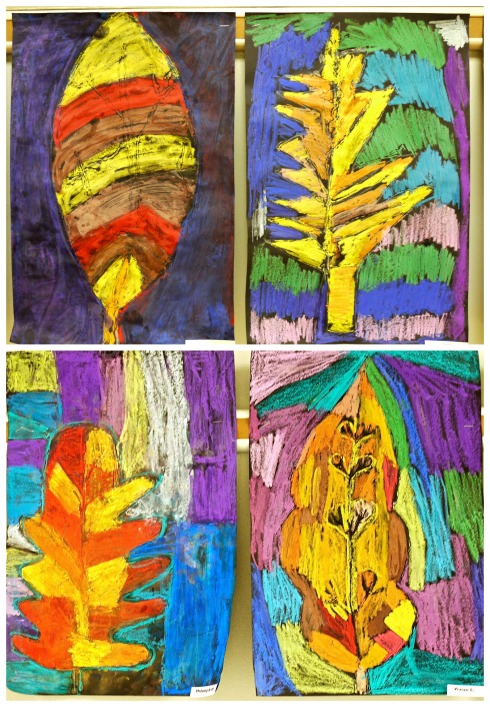
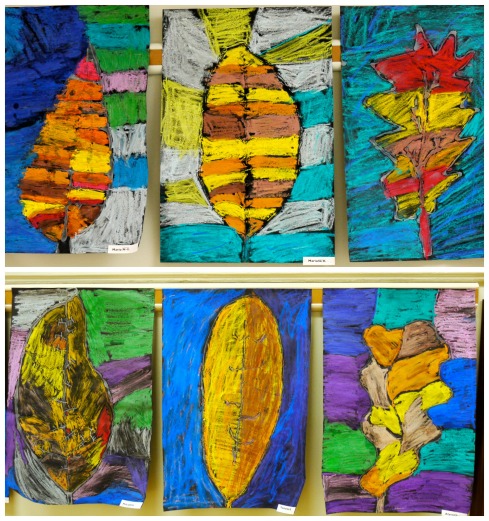
We start out the lesson by viewing examples of real leaves that students bring in. I also like to show them Autumn Leaves by Ken Robbins and Leaf Man by Lois Ehlert for additional examples and inspiration. We study the contours of the leaves, noting how some have wavy, zig zag, or curvy lines. Some are symmetrical while others aren’t. We talk about their shapes and the patterns the veins make.

glue resist pastel leaves. colors of my day blog.

After sketching out ideas, students draw one large leaf on black paper then outline with white glue. The next class, we view some close-up leaf paintings by Georgia O’Keeffe and study the real leaves again, noticing how the colors blend softly together. Students use warm colors for the leaf and cool colors for the outside to create a bold contrast.

glue resist pastel leaves. colors of my day blog.

glue resist pastel leaves. colors of my day blog.

Each student’s leaf turned out so bright and colorful and the student’s loved how the lesson connected to the current season. They were so excited to share both their found leaves and their beautiful artistic representations!
glue resist pastel leaves. colors of my day blog.

3RD GRADE PATTERN PUMPKINS

30 Sep

P1060227

We have been busy settling into the new school year and have just begun focusing on our fall-themed projects. The next month I will be posting some spectacular and colorful art projects created in the past autumn seasons. The leaves here in Wisconsin have just started to change so what perfect timing!

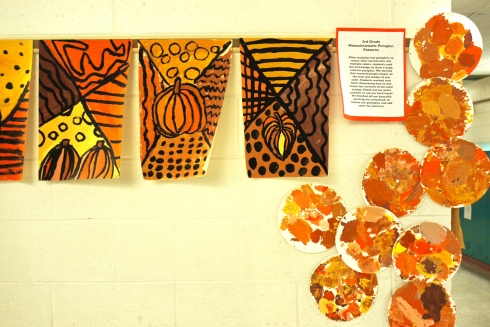
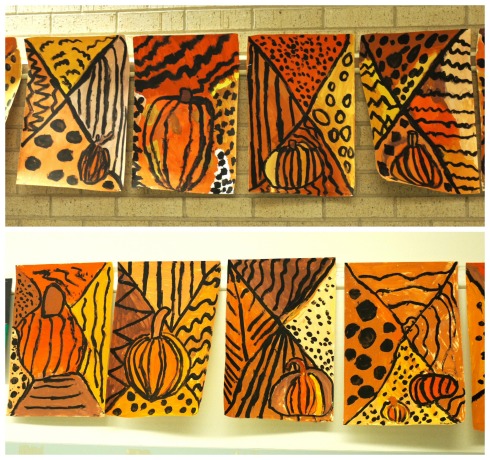
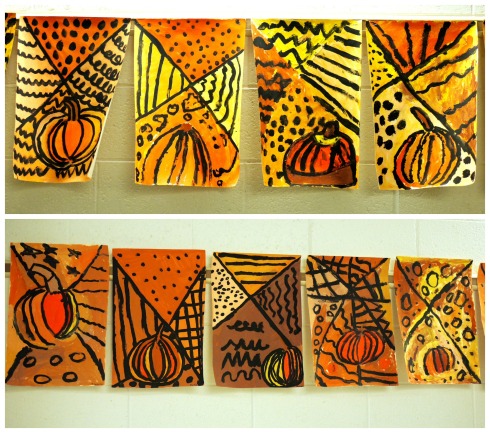
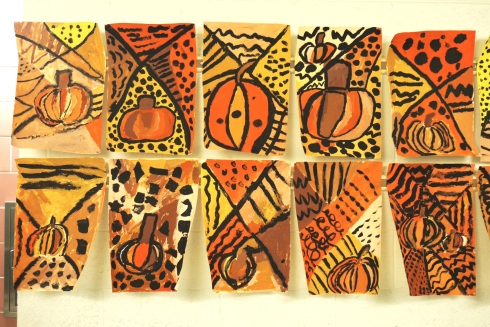
This was a lesson third grade students worked diligently on last fall. We started the lesson by observing a real pumpkin and making a list of adjectives to describe it. Students noticed that the pumpkin was shaped like a sphere with curved lines that started at the stem. These lines also gave the pumpkin a bumpy texture. We practiced drawing the pumpkin from life, making sure to carefully observe each detail in order to create the most realistic pumpkin. Once confident, students drew another large pumpkin on their final papers. They then drew two diagonal lines to create a background.

pumpkin pattern2

The next class, students again observed the pumpkin and came up with a list of colors they noticed. We practiced mixing new colors out of yellow, orange, white, and brown paint. This was by far the most joyful part of the project as students were amazed at all the new color combinations they were able to create. They blended colors for the pumpkin then also had to mix 4 different tints for the background.

pumpkins pattern1

Lastly, students used their knowledge of line to create bold patterns for their backgrounds using black paint. The simple outlines and patterns also helped to emphasize their lovely pumpkins as well as all the great new color combinations created.

P1060220

Inspired by this lovely pumpkin project.

2ND GRADE TED HARRISON INSPIRED LANDFORMS

3 Apr

chalk land2

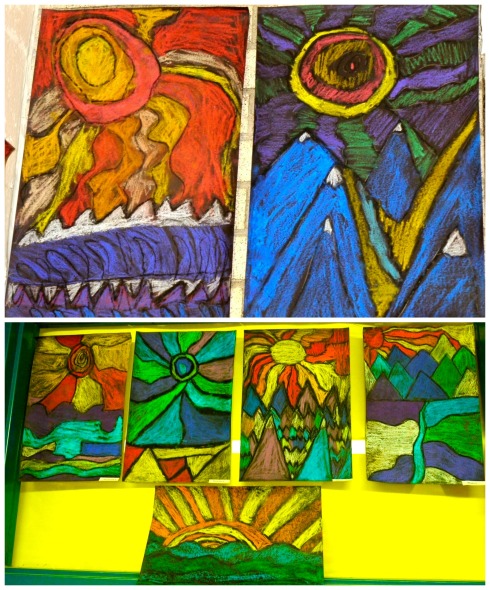
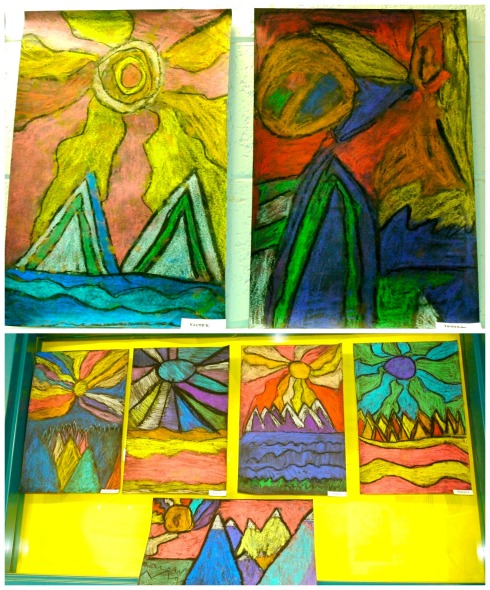
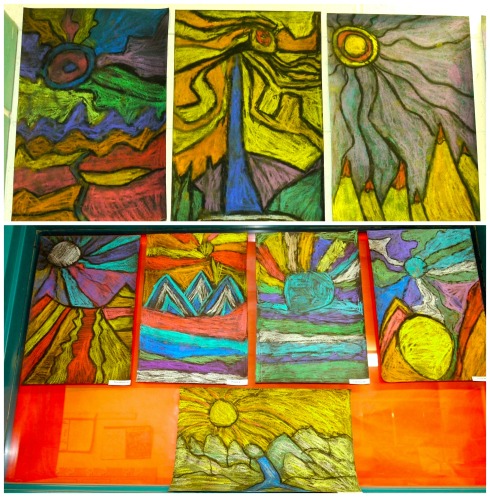
When I found out my 2nd graders were studying landforms in their Social Studies unit, I knew I had to try these Ted Harrison landscapes again. We went about the project in a pretty similar fashion but this time, instead of using glue to trace the lines, the students traced over their lines at the beginning and end with black oil pastel to help their designs stand out. My students were so eager to share and apply their knowledge of landforms and their enthusiasm really shone through on the final artworks.

Chalk pastels are definitely one of the messier mediums but there’s something about their vibrancy and boldness that make each project stand out. I’ve found it helpful to give students a baby wipe after each chalk session–cuts down on clean up time at the sink and encourages the more mess-adverse students to continue knowing that they can spiff themselves up at the end.

chalk land3 chalk land4 chalk1

K GROUCHY LADYBUG TWO WAYS

24 May

Image

This is a great May lesson to explore texture and read one of my Kindergarteners’ favorite stories: The Grouchy Ladybug by Eric Carle. Students find this story so amusing and love the part when the great big whale smacks the ladybug back to his leaf. It’s a good lesson on being kind and friendly instead of mad and grumpy.

After reading the story, students continued their knowledge of texture as they completed a crayon rubbing over texture plates to prepare their papers for their grass and dirt. Then, they used their cutting skills to cut a bumpy line for their dirt and strips of green for the grass which they glued to their backgrounds.

The next class, we went over the parts of the ladybug, noticing how they all have different patterns of black spots. Students created however many ladybugs they wanted and glued them to their grass and sky. They made sure to add six legs and some tiny antennae to finish off their bugs. They turned out great!

Check back later for the printmaking version of this lesson!

Inspired by this project found on Artsonia.

2ND GRADE 3D LIZARDS

24 May

Image

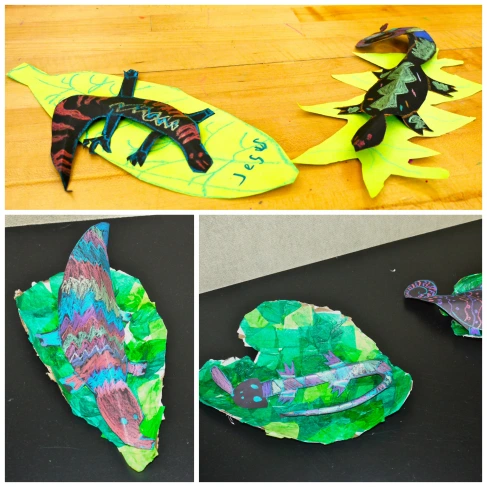
Here is the continuation of our reptile unit I meant to share before our Spring Art Show took over my life! My 2nd Graders were fascinated by all they learned about chameleons and their enthusiasm definitely carried over into this project. I created a Powerpoint of lizard facts and photos so they could discover the many colors and patterns found on these amazing creatures. The red and blue lizard was one of their favorites–they called it the “Spiderman” lizard!

Students then used this inspiration to design a colorful, patterned lizard on black paper using construction paper crayons for vibrancy. Last year students designed a tissue paper collage leaf that gave a nice, thick base for their creations. The previous year we just used regular construction paper and their sculptures weren’t quite as sturdy. They loved discovering how to bend and fold their 2-D drawing into a 3-D lizard. It really allowed their friendly lizards to come to life!

Image

Image

2ND GRADE COLORFUL CHAMELEON COLLAGES

29 Apr

Image

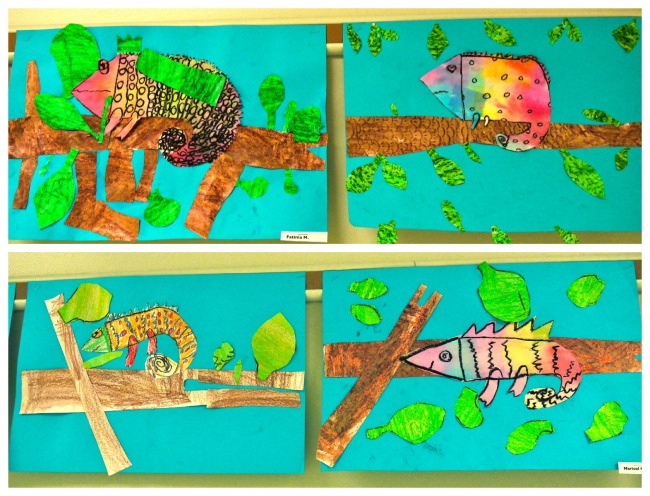
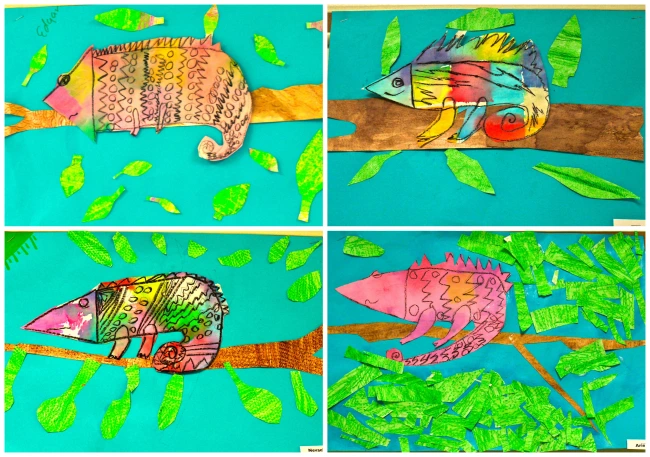
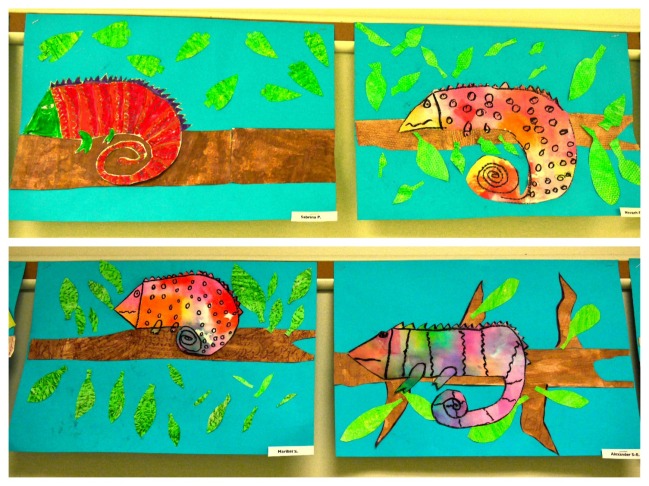
Continuing with the literature-based art theme, here are some spectacular chameleons created by my 2nd grade students last spring during our lizard unit. During this unit, we read two great chameleon books:

Chameleon’s Colors by Chisato Tashiro

A Color of His Own by Leo Lionni

We also viewed some National Geographic Kids videos of real chameleons changing colors. The kids thought they were pretty much the coolest lizards in all creation.

They prepared their chameleon paper by brushing water over multi-colored bleeding tissue paper squares. They used texture rubbing plates to create a texture for their leaf and branch papers using crayons. These papers were then painted over with watercolor, creating a textured wax resist.

The next class, students practiced their chameleon drawing skills using a step-by-step drawing sheet, a lifesaver for my easily-frustrated students! Yet notice how each chameleon still has its own personality. Once comfortable, students created their final drawing on the prepared colorful paper. After cutting a large branch, leaves, and adding their chameleons to their composition, the masterpieces were complete.

Check back later for the 3D lizards from this unit!

These chameleons were inspired by this drawing lesson found on Art Projects for Kids.

Image

Image

4TH GRADE GEORGIA O’KEEFFE FLOWER CLOSE-UPS

12 Apr

Image

Image

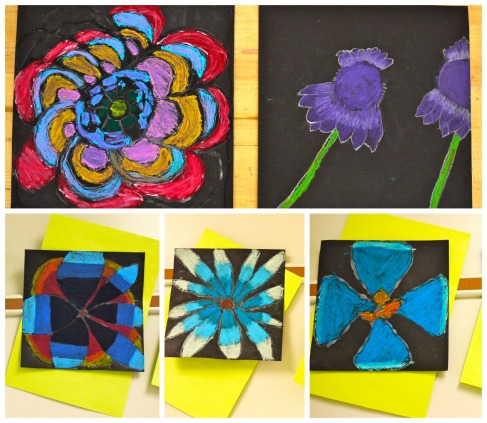
I have done this Georgia O’Keeffe flower lesson the last two years with my 4th grade students. We start out the lesson by viewing a Powerpoint showcasing some of O’Keeffe’s flower paintings as well as interesting facts about her life, including that she was born right here in Wisconsin. We discover how she wanted to paint flowers big so that even busy people would stop to notice their beauty and intricate detail. Some of my favorite books to share about O’Keeffe during this unit are:

My Name Is Georgia: A Portrait by Jeanette Winter

Through Georgia’s Eyes by Rachel Victoria Rodriguez

Georgia Rises: A Day in the Life of Georgia O’Keeffe by Kathryn Lasky

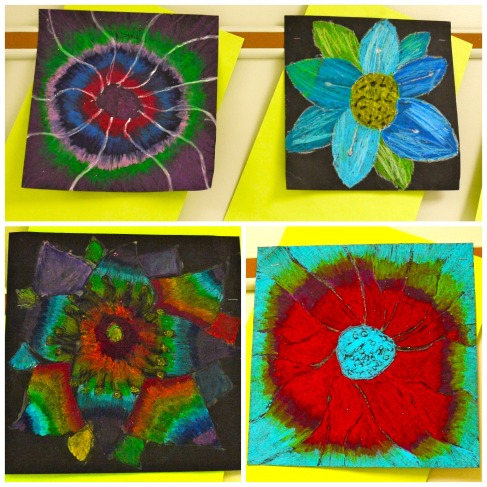
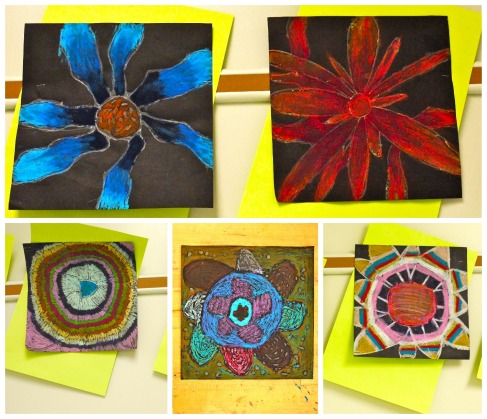
I also laminated a huge stack of flower photographs (recycled junk mail from a seed catalog!) for reference as they began their first sketches. This was a great way to bring in some science. The main goal of the lesson was to zoom in on the flower, making sure to capture each tiny detail as inspired by O’Keeffe’s style. Students drew their final flowers with pencil on black 12 x 12 paper, outlining their drawings with glue. Once the glue dried, we reviewed O’Keeffe’s paintings, noticing how smoothly her colors blended, often using monochromatic tints and shades. Students tried creating this effect by coloring thickly with similar shades of their chosen color using oil pastels. Check out all their details–what a success!

Image

Image

1ST GRADE PATTERN OWLS

3 Mar

Image

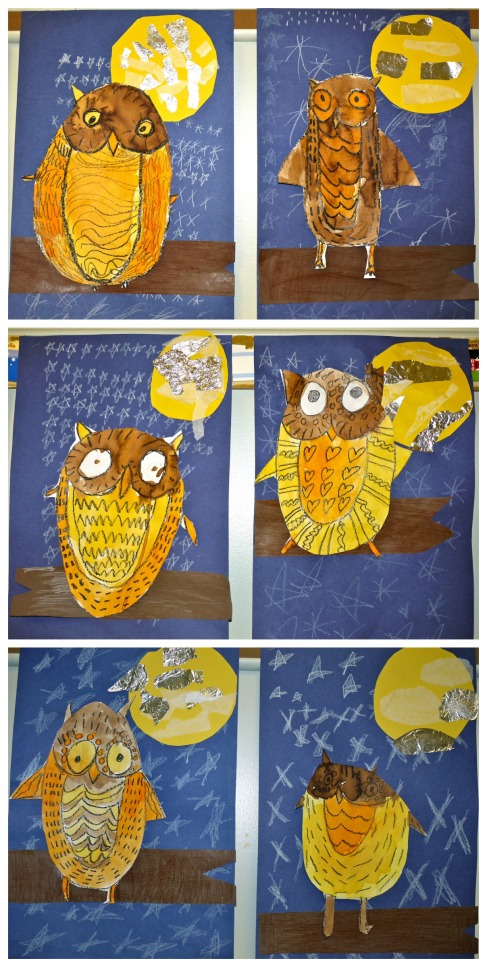
My 1st grade students began this lesson by reading Good-Night, Owl! by Pat Hutchins. We zoomed in on my document camera to take a closer look at the patterns Hutchins uses to illustrate her owl. Students were eager to share some of their own pattern ideas as they had been learning about patterns in their classroom. They practiced drawing their owls using a step-by-step drawing sheet I had created.

Sidenote: The use of these drawing sheets have worked wonders in helping my kiddos find success in art. Previously during drawing lessons, my students would become frustrated when it came time for them to draw on their own. I would clearly demonstrate beforehand, but many students would forgot by the time they started drawing. Since most of my students have not had any art experience outside of school, they need extra encouragement and guidance. I was amazed the first time I used these how confident my students became while drawing. The best part is that each student’s drawing always has its own unique look even though they had the same directions.

Back to the project–after drawing their owls with a black crayon, they filled them in with different patterns and painted over them with brown, earthy owl colors. The next class, students drew stars on their blue papers for nighttime and made a bright, collage full moon for the sky. They also created a texture rubbing on brown paper and cut it into a branch shape. Lastly, their owls were cut out and glued onto the branch. They sure loved making their owls!

3RD GRADE OWL MOON LANDSCAPES

3 Mar

Image

Last year my 3rd graders created winter landscapes inspired by Jane Yolen’s Owl Moon. This quiet, simple story filled with descriptive language and metaphors, as well as the muted watercolor illustrations, alludes to the stillness of a winter’s night and the magical feeling a child gets when going on a special adventure for the first time. The story always gives me goosebumps. We watched the video version of the book as an introduction for the lesson.

Afterwards, students created a watercolor wash for the background, using the cool winter colors found in the story. After painting, salt was sprinkled over the paper to create additional texture. The next class, students viewed photos of winter tree silhouettes and used recycled cardboard to print a winter tree and snow. Q-tips were used to create falling snow and the owls sitting on the branches. We used white tempera paint but I would recommend acrylic if available as it would be more opaque. Each student’s winter landscape looked as quiet and peaceful as the story.

Inspired by this project found on Kids Artists.

Image

4TH GRADE TEXTURE COLLAGE POLAR BEARS

3 Mar

Image

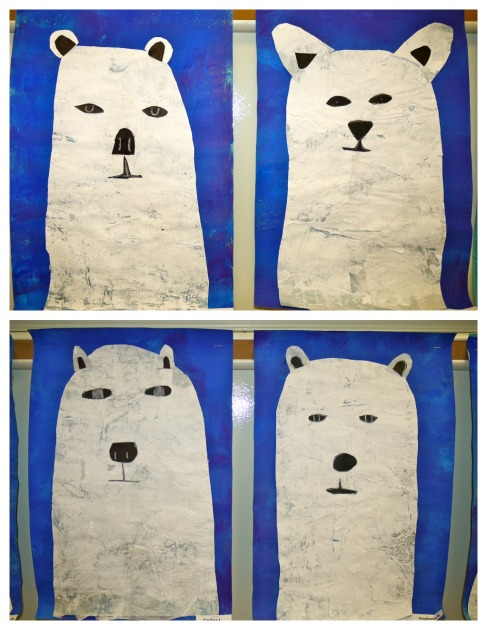
Last year my 4th graders created these texture collage polar bears inspired by this artwork by artist Ryan Fowler. I liked the variation in texture on his polar bear print and wanted to give my students a chance to explore different collage and painting techniques. After viewing Fowler’s artwork and a Powerpoint with interesting polar bear facts and photos of both the bears and their habitat, students got to work creating their textured papers. On a light blue piece of construction paper, students brushed a glue mixture over ripped and crumpled pieces of white tissue paper to create a rough texture.

The second class, students used a brayer to roll white paint over their textured paper. On a second sheet of turquoise paper, they rolled blue, purple, and light blue paint for the background, to represent the cool colors found in the polar bear habitat. I encouraged them to go with the process of rolling paint, allowing some of the paper to show through to create variation. This especially helped bring out the texture on the prepared light blue paper. Lastly, we reviewed Fowler’s print and discussed how to create a simplified, stylized polar bear. Each one seemed to have a personality as the students added the details. They turned out great! 

Image