Archive | cutting RSS feed for this section

PreK KENTE CLOTH COLLABORATION

8 Dec

Image

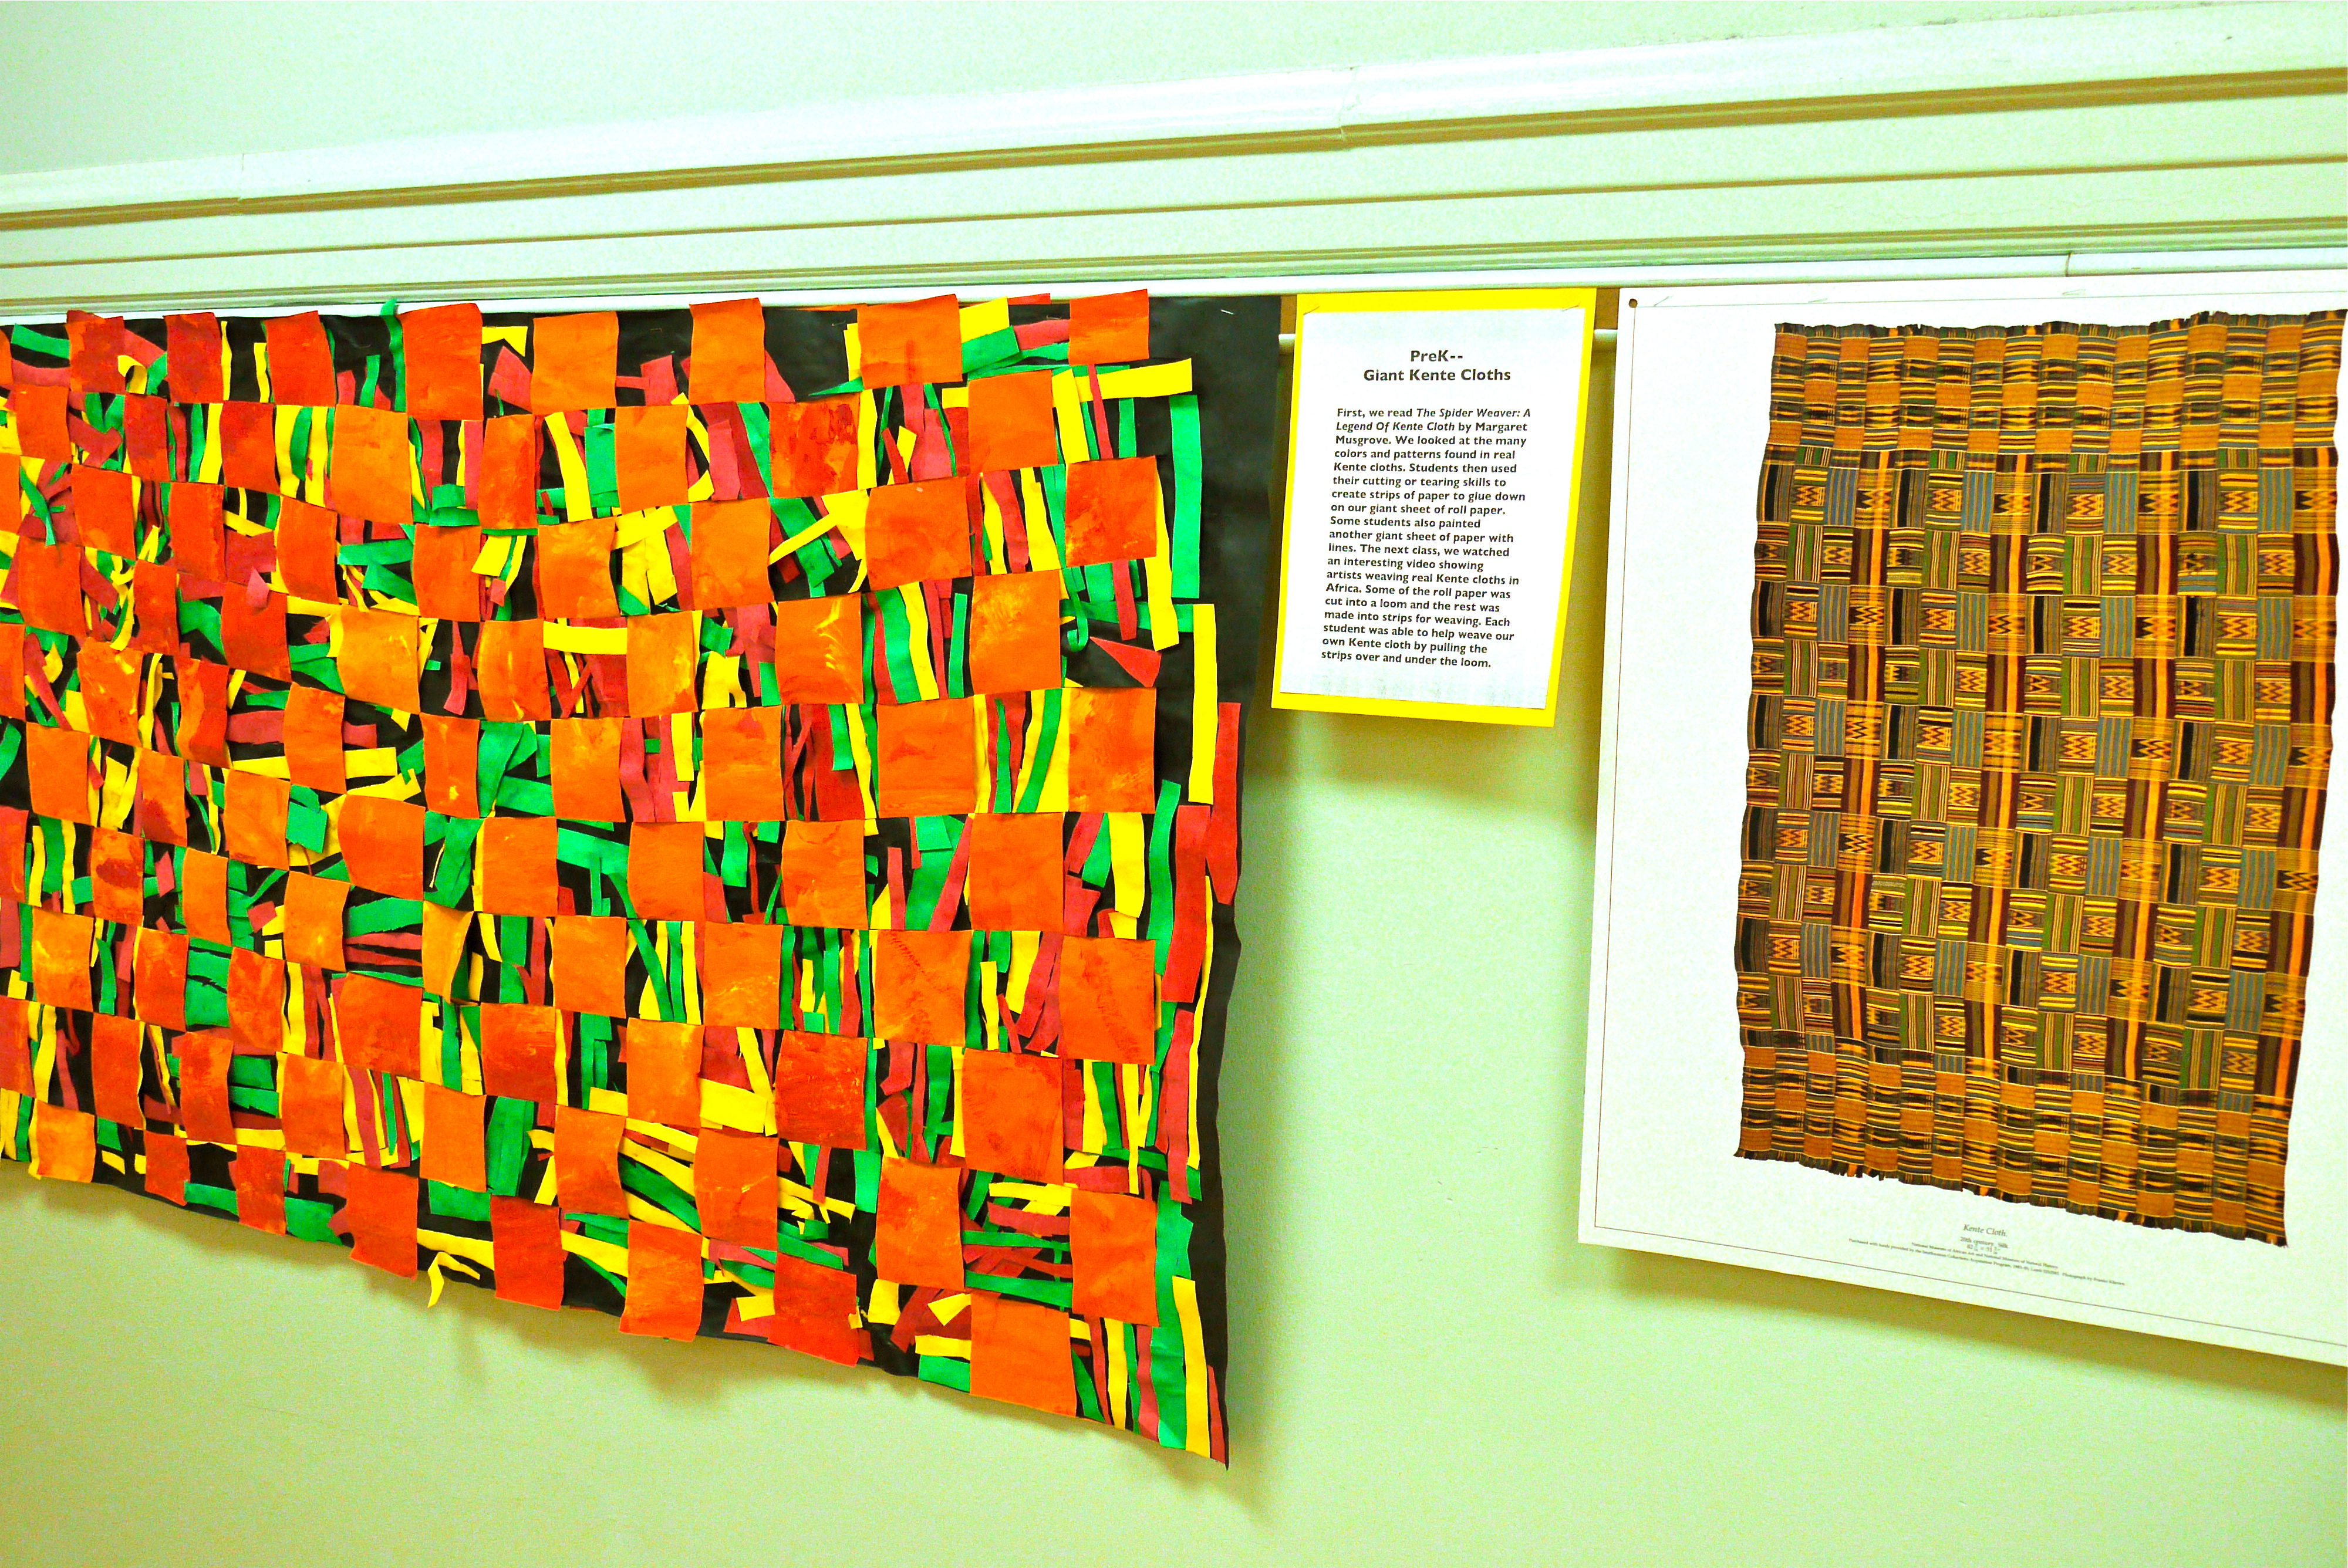
Closing out our African Art Unit, PreK students helped to make these giant collaborative Kente Cloths over four 30 minute class periods. First, students used their fine motor skills to practice cutting strips of paper in some of the traditional Kente cloth colors. The next class, students took turns gluing the strips to large butcher block sheets of black paper. The third class, they tried out some color mixing on oversized paper. For the grand finale, we watched this great video showing examples of the Kente cloth and artisans weaving them skillfully on large looms. We learned when you weave you have to go over and under like a pattern. Ahead of time I folded and cut the black collaged paper into a huge warp and the painted paper into strips for the weft. Students took turns weaving carefully until each Kente cloth was complete. What a statement they made!

Inspired by this project found on Artsonia.

 Image

Image

Image

K TRIANGLE LEOPARDS

17 Jun

Image

School is finally out, so that means I will have more time to share some spectacular art projects here. I plan on updating at least weekly so keep checking back for more!

My Kindergarteners worked on these fantastic leopards during our African Art unit. Every year, we have a schoolwide Black History program to celebrate the contributions and heritage of African Americans in our world and community. In art class, I choose a relevant theme for each grade level to study and draw inspiration from for an art project. This year, I focused on the rich traditional art forms found in Africa as well as some of the most well-known animals native to the continent. My students absolutely loved learning about the animals.

For Kindergarten, we continued our exploration of simple shapes to create a triangle leopard. We read Bringing the Rain to Kapiti Plain by Verna Aardema to start off the lesson. We viewed photos of real leopards and learned some interesting facts. Students then were given a step-by-step drawing sheet to help guide them along. They added all the details with crayons then painted blue watercolor over to create a resist effect. Lastly, green leaves were added to help their leopards appear to be hiding in the trees. They all turned out so great!

Inspired by these tigers found on We Heart Art.

Image

Image

K GROUCHY LADYBUG PRINTMAKING VERSION

24 May

Image

This was the first version of The Grouchy Ladybug lesson I did with my Kinders, way back when I first started teaching! After reading the story, students use different shades of green tissue paper for the background. They viewed examples of ladybug’s anatomy, then used construction paper crayons to color the shapes and designs. They made sure to count all six legs. After creating the body, students cut out two red wings and attached them to their ladybugs. The last step was using foam stamps to print their black spots (this was some type of round, foam weatherstripping gap filler my husband helped me find at Menards).

I love how each ladybug seems to be in a different stage of flight or rest.

Image

K GROUCHY LADYBUG TWO WAYS

24 May

Image

This is a great May lesson to explore texture and read one of my Kindergarteners’ favorite stories: The Grouchy Ladybug by Eric Carle. Students find this story so amusing and love the part when the great big whale smacks the ladybug back to his leaf. It’s a good lesson on being kind and friendly instead of mad and grumpy.

After reading the story, students continued their knowledge of texture as they completed a crayon rubbing over texture plates to prepare their papers for their grass and dirt. Then, they used their cutting skills to cut a bumpy line for their dirt and strips of green for the grass which they glued to their backgrounds.

The next class, we went over the parts of the ladybug, noticing how they all have different patterns of black spots. Students created however many ladybugs they wanted and glued them to their grass and sky. They made sure to add six legs and some tiny antennae to finish off their bugs. They turned out great!

Check back later for the printmaking version of this lesson!

Inspired by this project found on Artsonia.

ANNUAL PREK-5TH SPRING ART SHOW

13 May

Image

Image

We recently held our all school Spring Art Show for students and their families. I displayed our latest projects plus a sampling of the wonderful artwork created throughout the year. Every child had at least one piece of artwork on display. The PTA and many of my awesome colleagues helped with an Ice Cream Social that night as well, which really seemed to bring in tons of families. My principal has been really trying to get our families more involved in the school and it was great to see such a huge turnout for our art night. Enjoy some more photos from the big night!

Image

Image

Image

Image

Image

Image

Image

Image

Image

Image

Image

Image

K MONDRIAN INSPIRED COLOR MIXING

31 Mar

Image

My youngest students always find our color mixing unit so magical. My favorite book to introduce the concept is Mouse Paint by Ellen Stoll Walsh. They love guessing what colors the mice will mix up next and I find many of my students I had previously in PreK will actually remember the formula for creating new colors! They are amazed that you can create so many new colors out of the three primaries.

After talking about the primary colors, I showed them a Powerpoint of Mondrian paintings, where we noticed that he used lots of rectangles and squares as well as the primary colors. They made a collage with black paper strips, creating different sized rectangles and squares.

The next class we went over the color mixing formulas. I worked with the students in small groups, making sure to only keep two primary colors at each table. So, I had an orange table, a green table, and a purple table. This really helped to give them the full color mixing experience rather than ending up with brown paint all over their papers. They mixed the colors inside each square or rectangle. They all had such a blast and were thrilled to discover they really could make a new color just by mixing two primary colors. Success!

Inspired by this project found on Artsonia.

PRESCHOOL DOT COLLAGES

6 Mar

Image

My PreK students were learning about the different types of shapes. To introduce circles, we read The Dot by Peter Reynolds.

Students then used their cutting skills to trim multi-colored squares into small, medium, and large circle shapes. After pasting the circles down, recycled paper tubes and corks were used to print large and small circles or dots all around their papers. I like how some of the kids figured out they could print a small dot inside a large one.

This simple project gave my preschoolers a chance to continue to hone their fine motor skills while also creating a bright, bold work of art!

Inspired by this art project on Art is Basic.

Image