Archive | ladybugs RSS feed for this section

K GROUCHY LADYBUG PRINTMAKING VERSION

24 May

Image

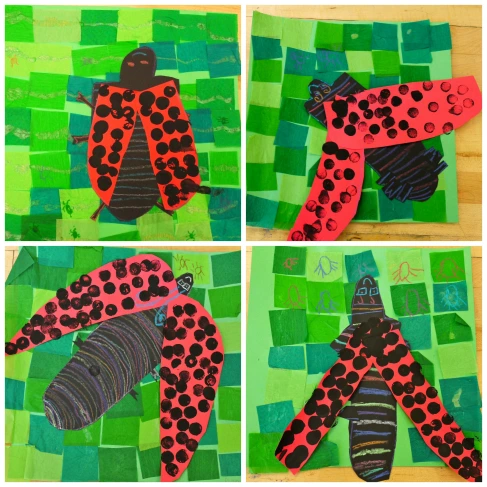
This was the first version of The Grouchy Ladybug lesson I did with my Kinders, way back when I first started teaching! After reading the story, students use different shades of green tissue paper for the background. They viewed examples of ladybug’s anatomy, then used construction paper crayons to color the shapes and designs. They made sure to count all six legs. After creating the body, students cut out two red wings and attached them to their ladybugs. The last step was using foam stamps to print their black spots (this was some type of round, foam weatherstripping gap filler my husband helped me find at Menards).

I love how each ladybug seems to be in a different stage of flight or rest.

Image

K GROUCHY LADYBUG TWO WAYS

24 May

Image

This is a great May lesson to explore texture and read one of my Kindergarteners’ favorite stories: The Grouchy Ladybug by Eric Carle. Students find this story so amusing and love the part when the great big whale smacks the ladybug back to his leaf. It’s a good lesson on being kind and friendly instead of mad and grumpy.

After reading the story, students continued their knowledge of texture as they completed a crayon rubbing over texture plates to prepare their papers for their grass and dirt. Then, they used their cutting skills to cut a bumpy line for their dirt and strips of green for the grass which they glued to their backgrounds.

The next class, we went over the parts of the ladybug, noticing how they all have different patterns of black spots. Students created however many ladybugs they wanted and glued them to their grass and sky. They made sure to add six legs and some tiny antennae to finish off their bugs. They turned out great!

Check back later for the printmaking version of this lesson!

Inspired by this project found on Artsonia.